¶ Introduction
The main purpose of this part is to explain general notions and global concepts you need to know when working with Nodea Software.
¶ Entity concept
In Nodea applications the concept of data entity is very important because it represents the majority of the elements of a generated application. Basically an entity is the representation of a table in database. In the application an entity is displayed as a menu in a module (See Glossary), coming with all the appropriate forms to create or update or display an instance of entity, coming also with a delete button.
¶ UI
First of all an entity represents in terms of UI a “menu” in a module (See Nodea Glossary), this menu owns two sub items:
- Create
- List
And then it embeds different views and pages:
- Creation form → /entity/create_form
- Update form → /entity/update_form
- List → /entity/list
- Show page → /entity/show
¶ Technical
On the technical side, adding an entity to an application means a lot of things :
- the view files are created
- a dedicated route file is created too with all the appropriate functions to get the pages ( see below the different basic url's )
- a data model is also created
- url's are exposed
- application is restarted so that you can use it
¶ Files
First of all, an entity is made of 3 fundamental elements of the MVC principle:
- Model file → /app/models/entity.js (See Models)
- Views folder → /app/views/entity/ (See Views)
- Route (Controller) file → /app/routes/entity.js (see Routes)
¶ URLs
An entity exposes several URLs by default, let's list them:
| URL (prefix by /entity) | METHOD | DESCRIPTION |
|---|---|---|
| list | GET | Redirection to the list.dust view of the entity |
| datalist | POST (ajax) | This is the ajax request used by the NodeaTables (See NodeaTables) in order to retrieve the asked database data to display in the datalist. |
| subdatalist | POST (ajax) | This is the ajax request used by the NodeaTables (See NodeaTables) in order to retrieve the asked database data to display in the datalist. This behaviour is only used in datalist that are in tabs of an entity (On the show page, see NodeaTabs) |
| show | GET | Show page of an entity row. |
| create_form | GET | Creation form of an entity. |
| create | POST | Creation route from submitting the creation form. |
| update_form | GET | Update form of an entity. |
| update | POST | Update route from submitting the update form. |
| loadtab | POST (ajax) | Ajax route to load tab content, see Ajax tabs working |
| set_status | POST | When clicking on a new status bouton, see Component Status |
| search | POST (ajax) | Search route for select2 plugin display, filter and pagination. |
| fieldset_add | POST (ajax) | Route used by generated code from ‘has many existing’ instruction to add row. |
| fieldset_remove | POST (ajax) | Route used by generated code from ‘has many existing’ instruction to remove row. |
| destroy | POST | Deleting an entity row. |
¶ Subentity
Let's define what means the term subentity in Nodea.
This is a data entity depending on another entity and which, at the time of its generation, was not considered to be added in the sidebar of the module.
To illustrate this here is an instruction script that does not generate subentity:
- add application My Application
- add entity Source
- add entity Target
- entity Source has one Target
And then an instruction script that does generate a subentity:
- add application My Application
- add entity Source
- entity Source has one Target
As you can see the difference between these two scripts and that in the second there is no declaration add entity Target. Then with the instruction entity Source has one Target the Nodea generator finds that the Target entity does not exist.
It therefore considers that the Target entity only exists in the scope of the Source entity and so will generate this entity without adding it in the sidebar of your module.
¶ Nodea online environment
Working in a Nodea environment means knowing how it's organized and which rules to follow in order to avoid difficulties.
¶ Overview
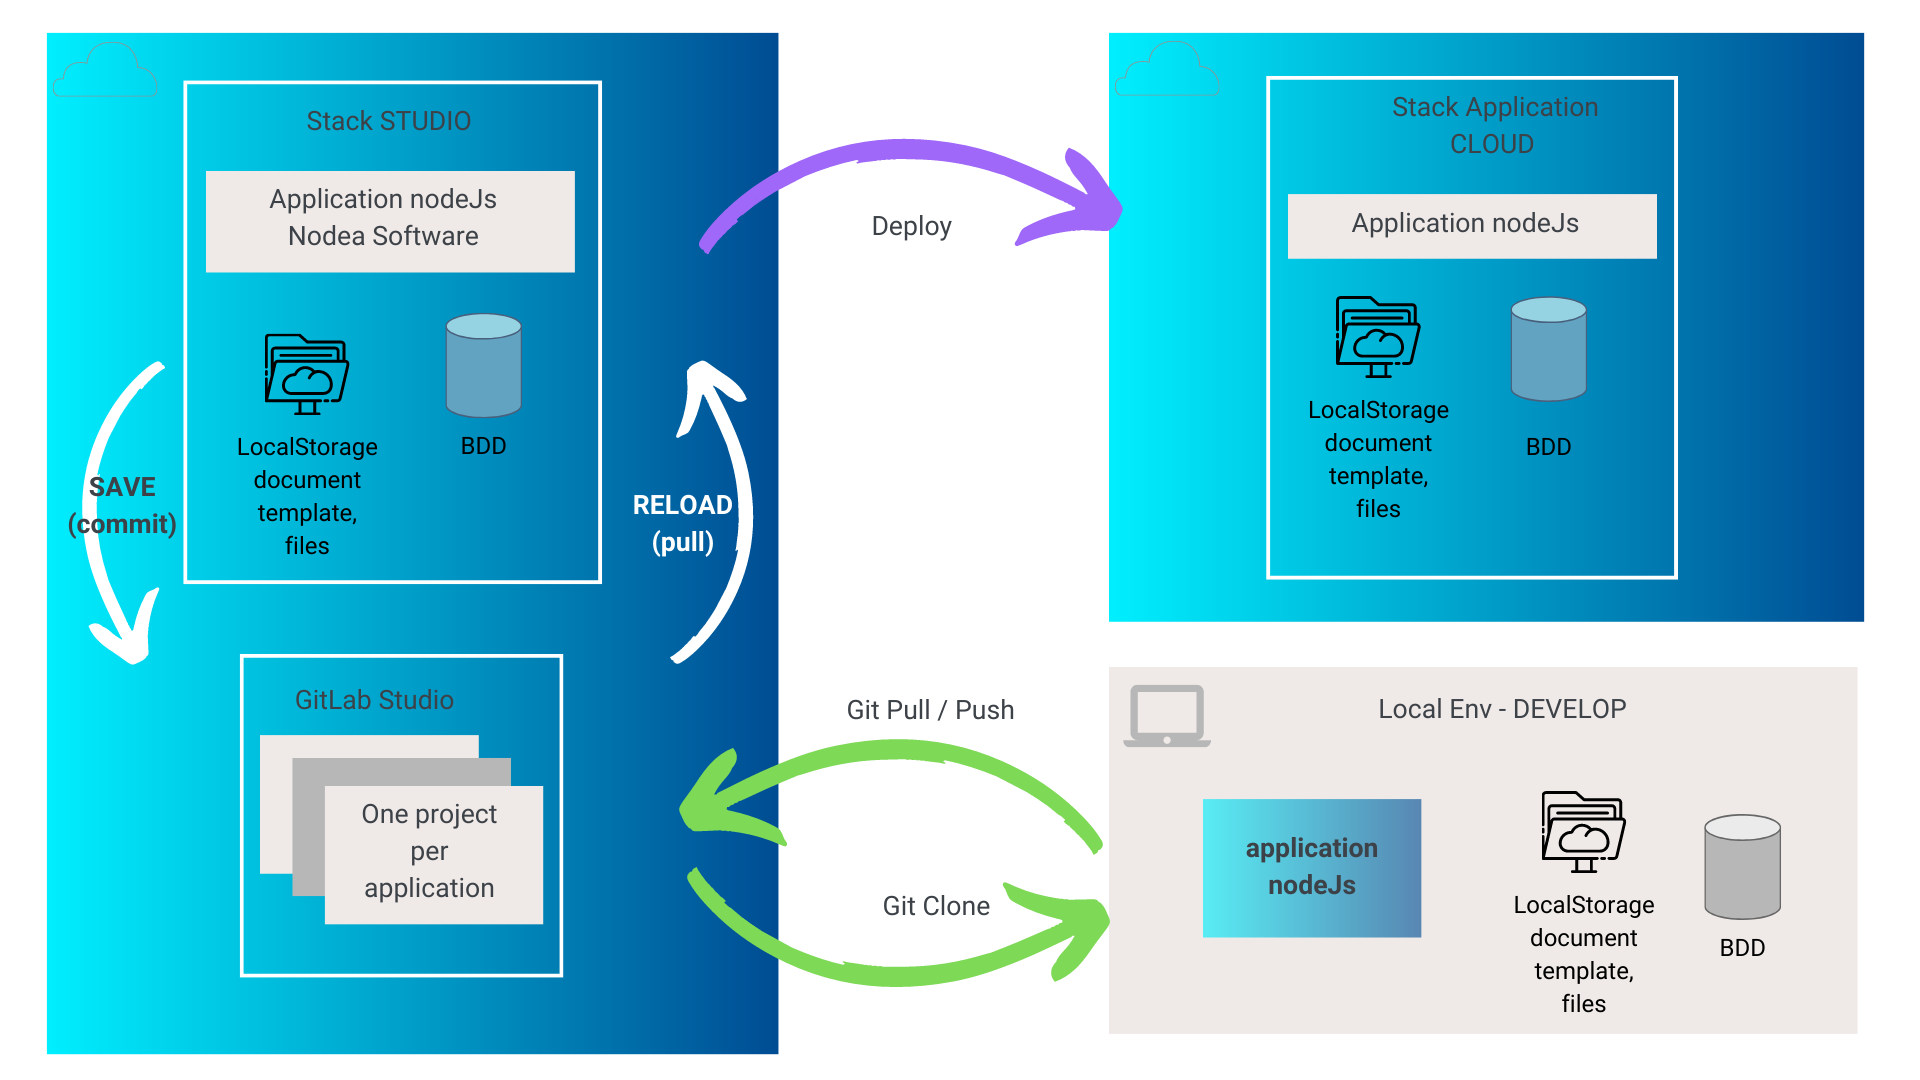
The diagram below shows an entire Nodea environment. Studio, Cloud and Local are 3 different technical environments, each of them having their own objective.
- Studio: Nodea's development environment, this is where you build your applications using instructions, and follow the specific development you have to do. This is also the place where you will do integration tests.
- Cloud: The environment where you allow users to qualify the applications you have developed. It could be used for production but this is not recommended.
- Local: Your local working environment, on your desktop, where you will develop specific business rules on generated applications

¶ How to work with the generator
The following diagram shows how you have to work with the generator as soon as you need to work both on local and online environment :

Important: To avoid any code conflict, it is necessary to follow these steps. In fact, if you modify the code of the application locally and at the same time on the studio, you will end up with conflicts to manage when the code is merged. So think about pushing your code and reloading on the studio side before executing any new instruction and vice versa.
¶ Local environment
After having generated your application on studio, you can get this application on your local environment and perform specific coding.
¶ Clone the app
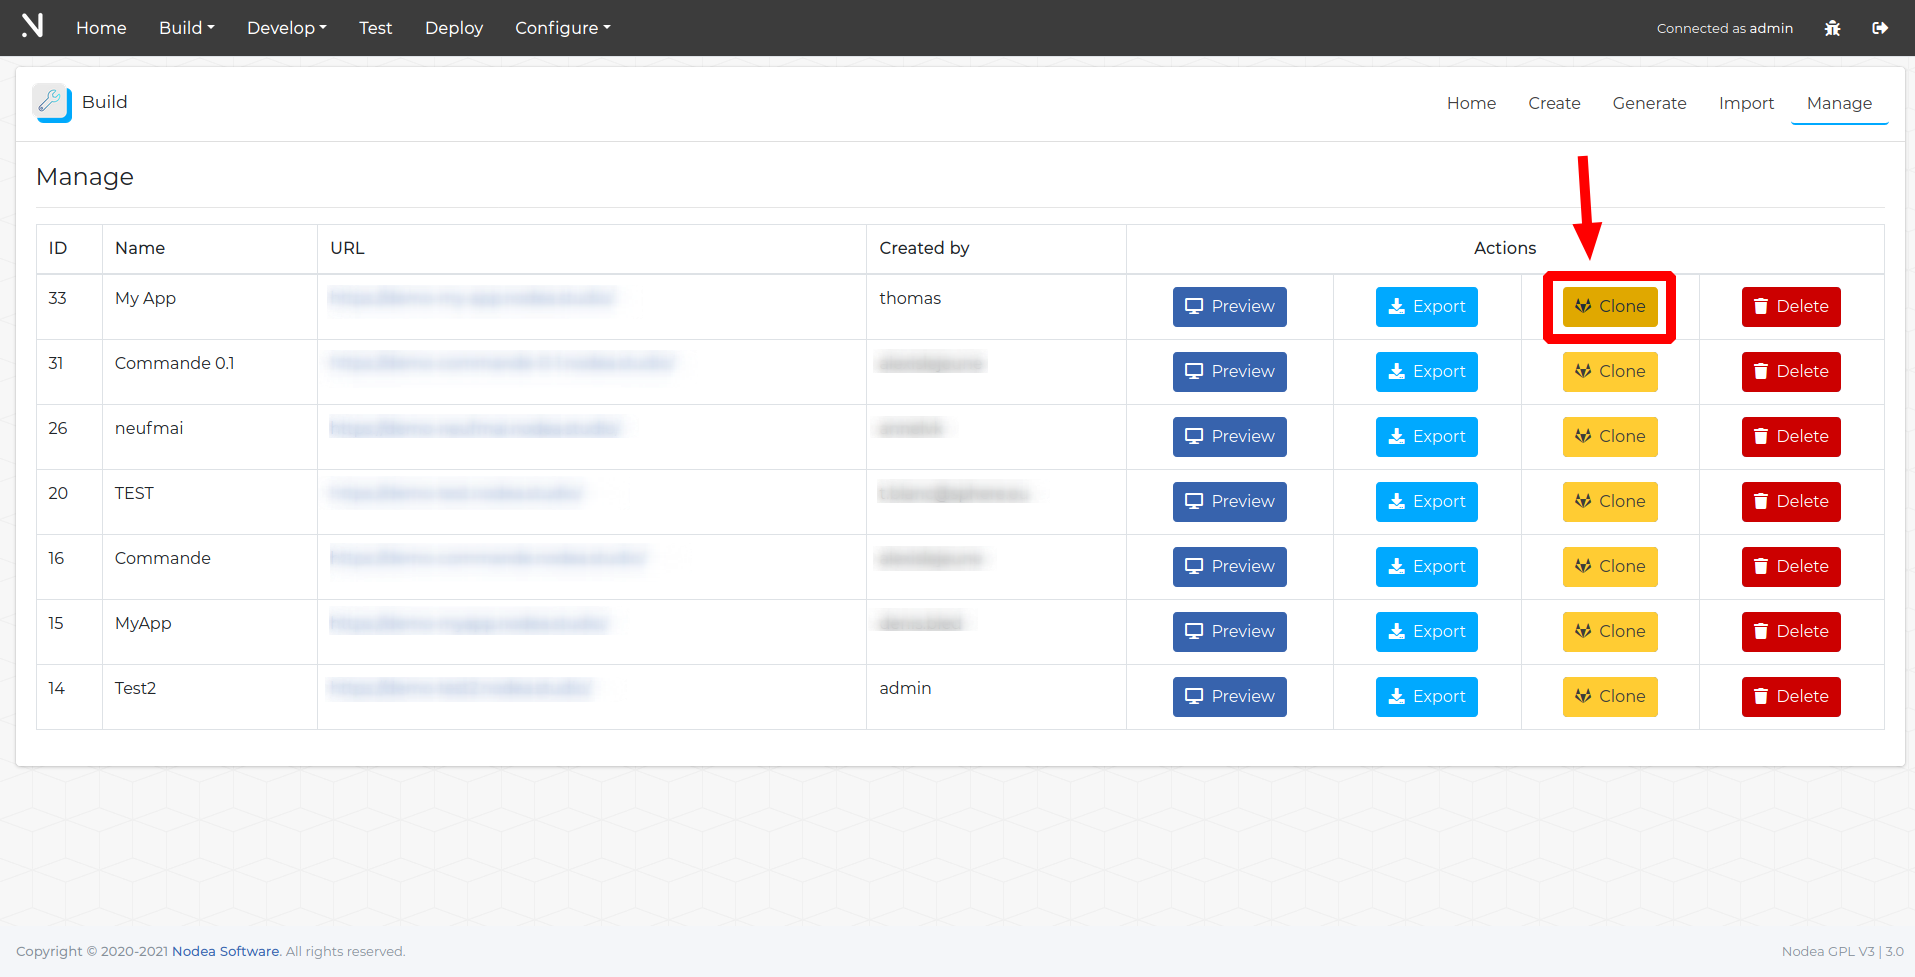
Connect to the studio, open “Build” / “Manage” menu and then click on the “Clone” button of the application you would like to get :

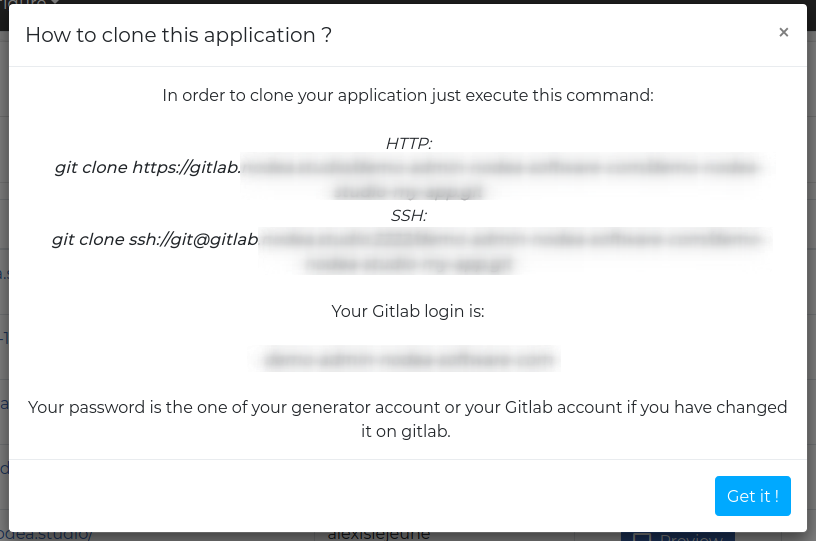
A popup will appear to give you all the information you need to clone the application on your local environment. If you want to clone in SSH, connect to gitlab with your account, and then add your SSH Key.

¶ Install an application locally
It will then be necessary to prepare a database and configure the config/database.js file accordingly.
In order to share the same content of database as the studio, you may export the studio database of your app (see Administration / BDD tools).
This can be useful for the status component for instance or for the access rights definition if you have already prepared and store them.
Now you can install node modules by executing this command:
npm install --no-optionalYou can remove the --no-optional if you also want to install Cypress.
Then the only thing to do is to launch the server with this command:
node serverAnd the application should be launched on 127.0.0.1:1337 !