¶ Automation
This documentation is dedicated to developers of Open Source RPA/RDA Nodea Software Automation applications.
¶ Getting Started
¶ 1. Concepts
Please refer to user guide : https://docs.nodea-software.com/user_guide/application/automation

¶ 2. Project methodology
What is robotic process automation?
Robotic process automation (RPA) is a technology for creating robots that perform a list of tasks assiged to them. It is used in companies to automate tasks such as validating the sale of insurance premiums, paying health insurance claims, or generating utility bills, etc.
Process automation can be done by a classical approach: a computer developer writes a computer program that performs a list of tasks and interacts with the application's programming interface (API) to provide results ; or by a robotic process automation approach: the system learns the list of tasks to be automated by observing the behavior of human users.
Conducting an automation project
The Nodea Software Automation solution allows you to create your own automated tasks (classical approach) and to implement the accompanying business logic by implementing communicating state machine systems. It requires an in-depth analysis of all the actions performed by the users of the applications in order to complete the tasks entrusted to it.
An automation project must be carried out with the users of the applications concerned. These users are the "knowers" of the system. They carry out operations that are sometimes not included in the manuals and most of the time they carry the business expertise.
Project phases
To implement a process automation, in a classic development approach, we recommend the following phases:
Phase 1: Analysis of the business process
What actions are performed by the department's employees? How do they connect to the applications? What is the sensitive information to be preserved?
The best practice is to sit down with the company's employees and go through the entire process with them, noting each manipulation they perform.
The aim is to see if and how the business process to be automated fits into the development framework that we propose (state machine, tasks to be done, etc.).
- Form of work: Collaborative workshop
- Duration: 1/2 day (2 to 3 hours)
- Participants: "knowledgeable" collaborator (visited company) + project management team (integrator) + technical expert (integrator)
- Deliverable: scoping note of the business processes to be automated
Phase 2: Construction of the task orchestration application
Which business entities (objects) are used? What are the statuses of these entities during the progress of the business process? What are the operations performed by the robots on the application that will be built?
We need to build the business application that will allow us to follow the automation and to implement the future work tool of the employees. To do this, we use the Newmips application generator and the "Automated Processing Orchestrator" application model.
This application model provides a pre-configured dashboard to follow the progress of the treatments by the robots.
- Form of work: Collaborative workshop + Specific developments
- Duration: 1 day workshop + additional developments depending on the business complexity
- Participants: "knowledgeable" collaborator (visited company) + project consultants (integrator)
- Deliverable: application deployed on the Cloud
Phase 3: Application exploration
Are the applications used Web-based? Do they support JQuery?
The objective is to list all the operations to be performed, all the URLs that will be browsed and to define the type of program that will be used to automate the processing: script or sequence.
The use of JQuery scripts is more efficient and reliable (because they are less subject to changes in the ergonomics of the applications visited) rather than RobotJS sequences that sometimes require the use of the mouse, which is more sensitive to the execution environment.
- Form of work: Work at the agency or on site
- Duration: 1/2 day
- Participants: technical experts (integrator)
- Deliverable: identification of programs and breakdown into steps
Phase 4: Program construction
What are the dynamic variables to be defined? What are the controls to be put in place to judge that the step is completed and that the subtask has been correctly executed?
This phase consists in building the programs executed by the robots. These programs are broken down into steps. Each step is the subject of a specific code also called snippet. In practice and to facilitate understanding, you can consider that a change of page (of URL) corresponds to the end of a step.
Example: if you are a broker and you simulate a quote on the Extranet of a partner insurance company in order to send a quote to a client, the steps are
- Connecting to the system
- Filling in the quote simulation form on an Extranet
- Retrieve the amount calculated by the system
- Creation of a new record on a Quote entity within the orchestrator (which will itself send an email to the customer with the amount of the simulation)
These 4 steps will be the object of 4 snippets of code executed sequentially by the robot. These code snippets can use different technologies: Javascript, JQuery or NodeJS.
The end of a step marks the end of a subtask which is logged by the robot on the main task at the orchestrator level in order to follow the progress of the process.
The use of JQuery scripts is more efficient and reliable (because they are less subject to changes in the ergonomics of the applications visited) rather than RobotJS sequences which sometimes require the use of the mouse which is more sensitive to the execution environment.
- Form of work: Work at the agency or on site
- Duration: depending on the number of programs to develop
- Participants: developers + technical experts (integrator)
- Deliverable: programs to be executed by the robots
Phase 5: Installation of the robots
On what type of workstation will the robots be installed? Do they have access to the target resources? Do they have all the rights to perform the tasks they will be given?
The bots are ready-to-use applications that will perform the tasks assigned to them by the orchestrator. They must be installed on the employees' workstations and their connection identifiers must be configured. Then, they are autonomous to work.
- Form of work: On-site installation
- Duration: 30 minutes per robot on average
- Participants: project consultants or technical experts (integrator)
- Deliverable: robots installed on the workstations
Important: phases 4 and 5 can be done in parallel.
¶ 3. Architecture
Overview
The architecture of an application being automated is organized as follows:
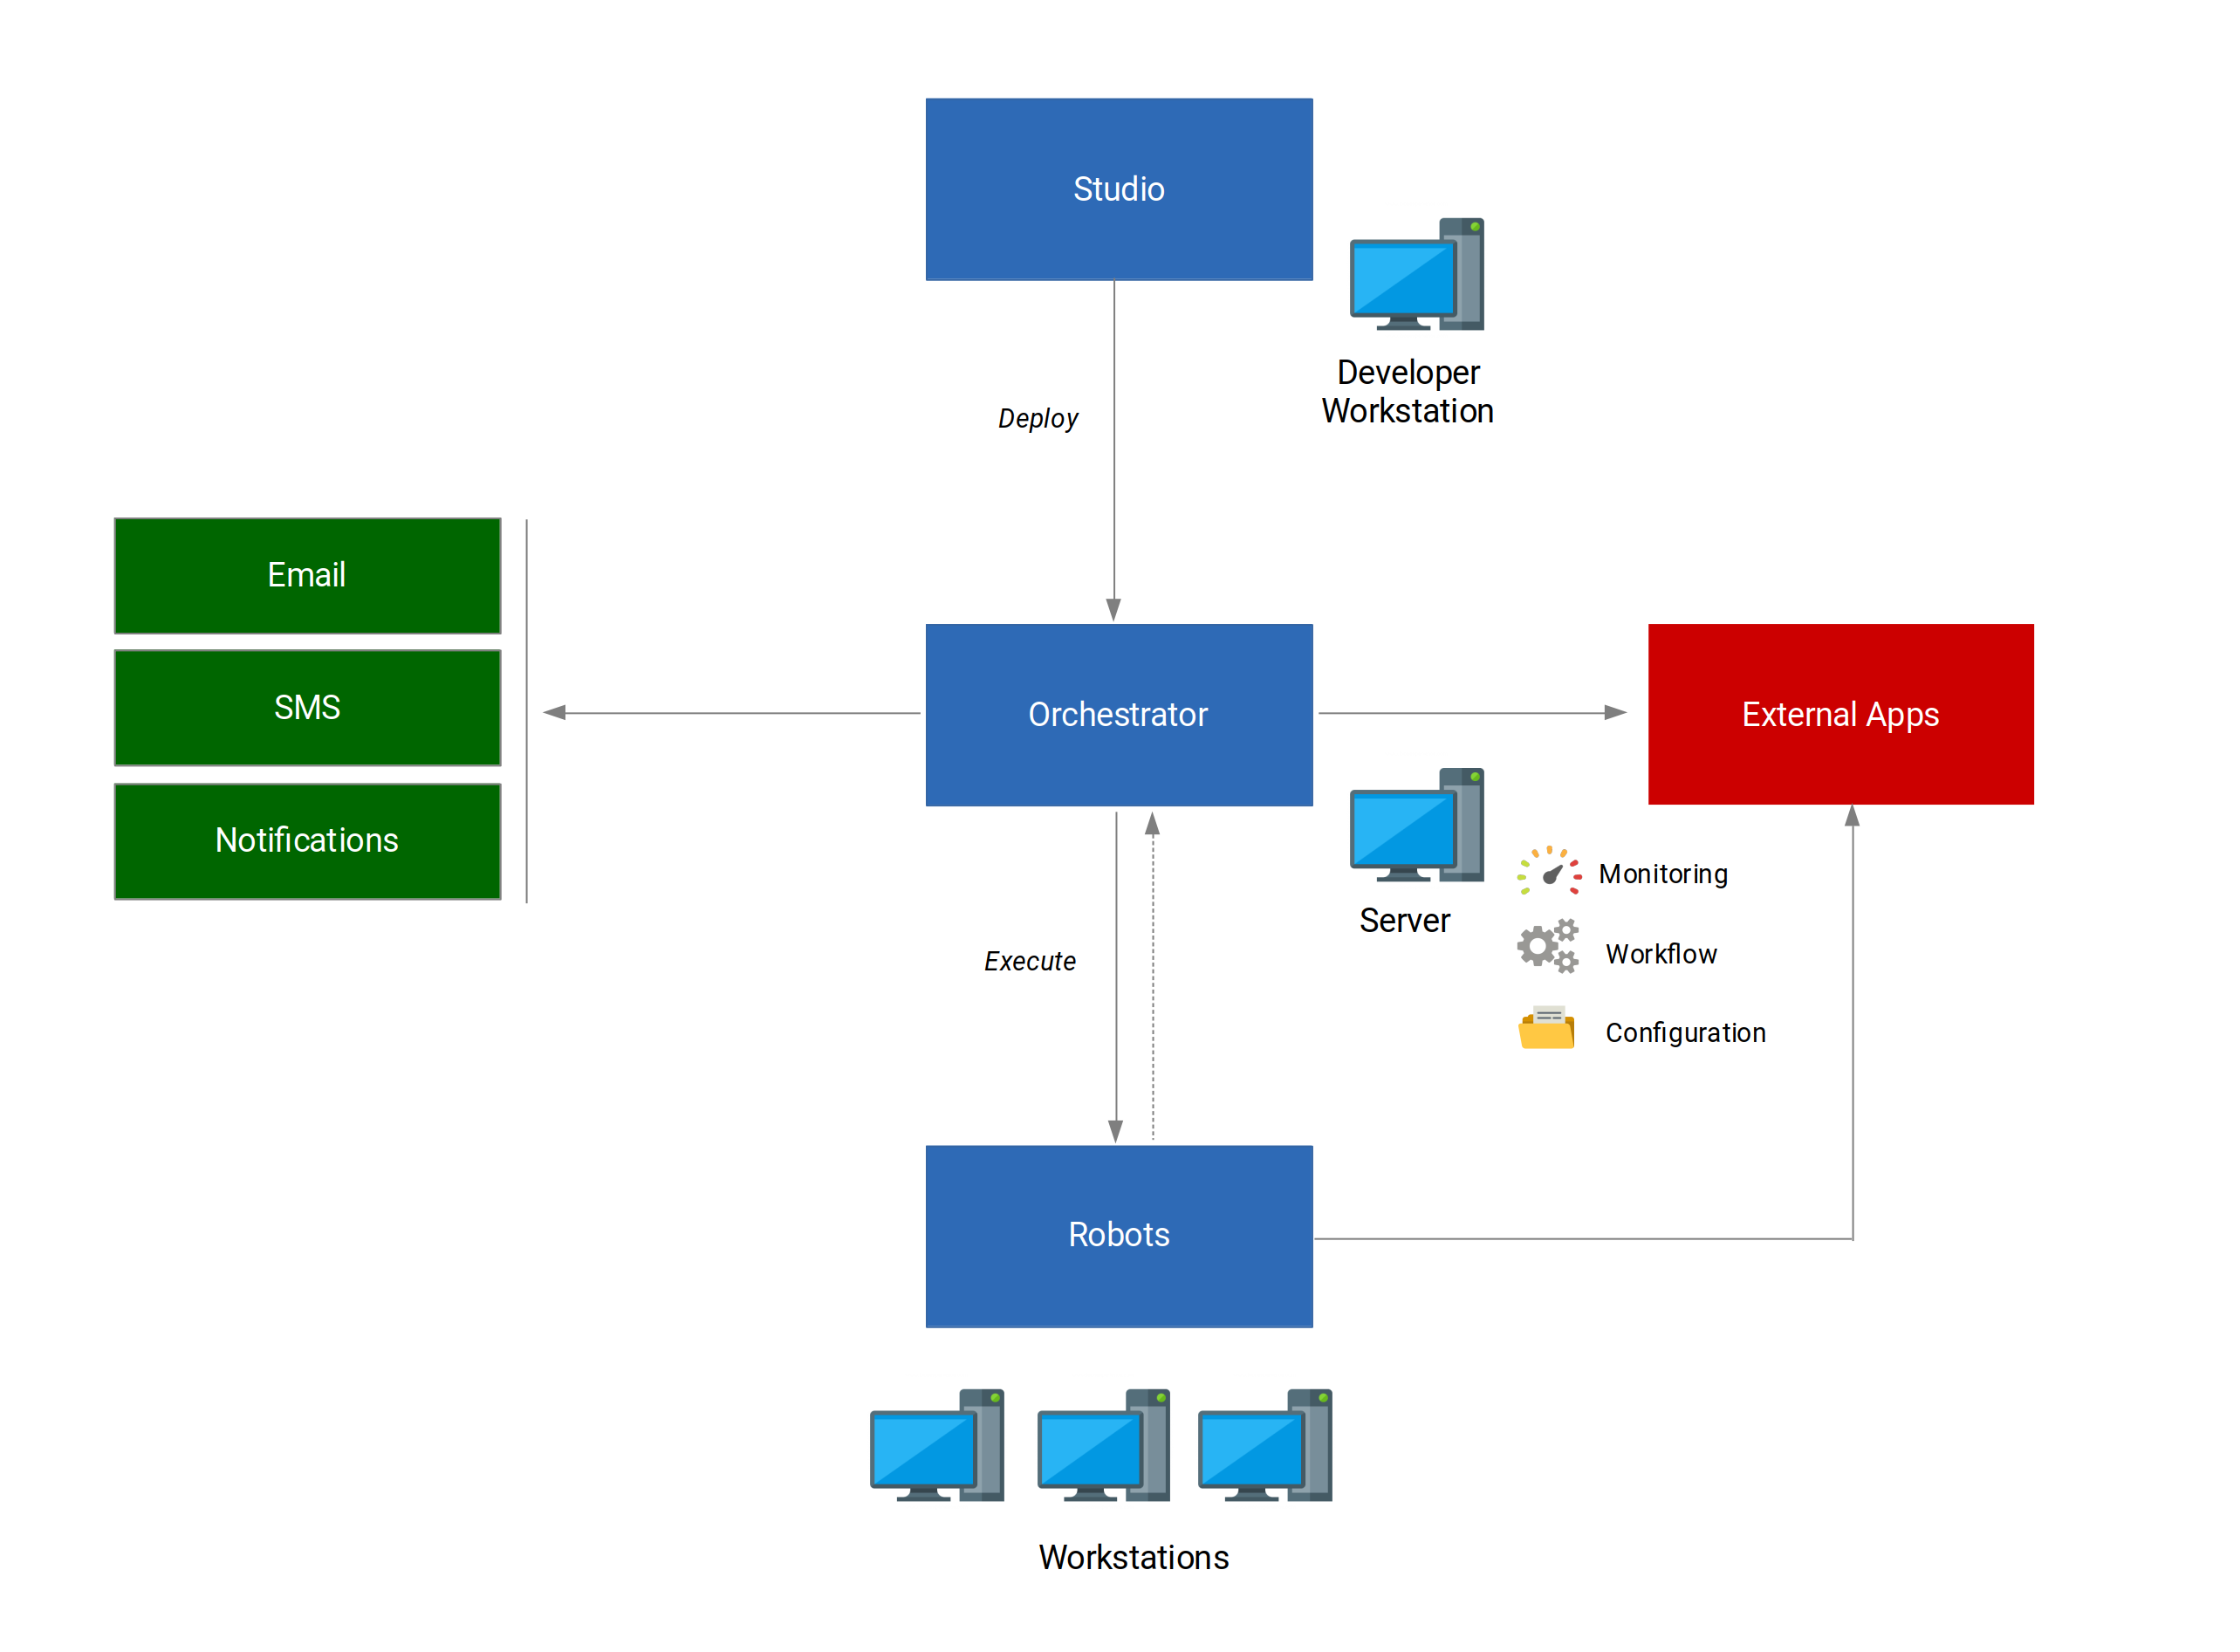
Functional logic
Role and responsibilities
The developers work with a development studio installed on their workstation or on a dedicated server. This studio can be coupled with a Git-type configuration management server (such as Gitlab). They build the business application carrying the orchestration functions using the "Automated Treatment Orchestrator (OTA)" application model available on Github, and the Newmips generator (low-code development platform).
Once completed, this application is deployed on a web server and configured to ensure external communication with customers / users (email, SMS, notifications) and the dispatch of tasks to robots.
The robots are installed on dedicated workstations or on the employees' workstations. They access the applications carrying the current business process and report the progress of their activity to the orchestrator. The orchestrator thus has a global and detailed view of the tasks to be processed / in progress / processed.
Robot operation
Robot work tree
The tree structure of the files of a robot (Electron application) is as follows
- a " build " directory created at the compilation of the application
- a " config " directory to store the connection identifiers to the orchestrator
- an "exec" directory including a directory for the pre-compiled node modules and a directory to load the programs (see structure described below)
- an "assets" directory to store all static resources
- a "utils" directory for libraries
- an "html" directory for the application's Web pages
- a "scripts" directory for the task management scripts
- the main files: main.js, robot.js, etc.
Structure of the programs
By convention, a program is a zipped archive with the following structure
- a "download" directory to store the files downloaded during the navigation
- a "script" directory for the snippets of script code
- a "sequence" directory for the sequences
- a configuration file at the root "config.json" to define the steps to be taken
When the robot executes a task, it downloads the program and unzips it in the "exec/program" directory. It then cleans the directory after execution.
Operating environment
In order to have maximum control over the environment in which the robot runs, the navigation is done in an ElectronJS "BrowserWindow" independent from the main window. The robot can thus execute its tasks in parallel with a collaborator connected to the computer or in a closed session.
For the sequences, the position of the mouse cursor is no longer dependent on the "look & feel" of the browser (status or task bars activated, additional plugin modifying the appearance of the window, etc.).
Program execution
The execution of a program relies on the configuration file that provides the steps to be followed and the snippets to be executed. The robot loads the startup URL and launches the code snippets (script or sequence) for each step.
The robot executes the Javascript or JQuery scripts directly from the Electron code. We use the "executeJavaScript" functionality for this: win.webContents.executeJavaScript(code);
The robot also executes NodeJS sequences by including them in the code on the fly.
Each time a step is completed, the robot updates the task on the orchestrator to indicate whether the subtask went well or badly. If it went wrong, the robot will raise the exception returned by the process.
When the task is completed or a step has gone wrong, the status of the task is updated (OK or ERROR).
Please note: The compiled node modules used by the programs are present in the "exec" directory. If the programs need to be updated, the robot will delete and recompile the new version modules itself. In practice, we create a module cleaning task at the orchestrator level that we assign to the robot(s) concerned.
¶ 4. Installation
¶ Studio
We encourage you to use your online Studio or the demo environment for a first try.
Please check: https://demo.nodea.studio/default/home
¶ Orchestrator
Ask for Automation module activation on your environment to our team.
¶ Robots
Before installing a Robot, be sure to install NodeJS on the workstation. Instructions are available on the prerequisites page.
Installation on the client workstation
Get the robot code on Github: https://www.github.com/frenchautomationorg/french-automation-robot
And run as root the commands:
npm install
npm start
Configuring the Web Server Connection
Before launching the processing (retrieving tasks from the orchestrator and execution), it is necessary to configure the connection to the API.
The procedure is as follows:
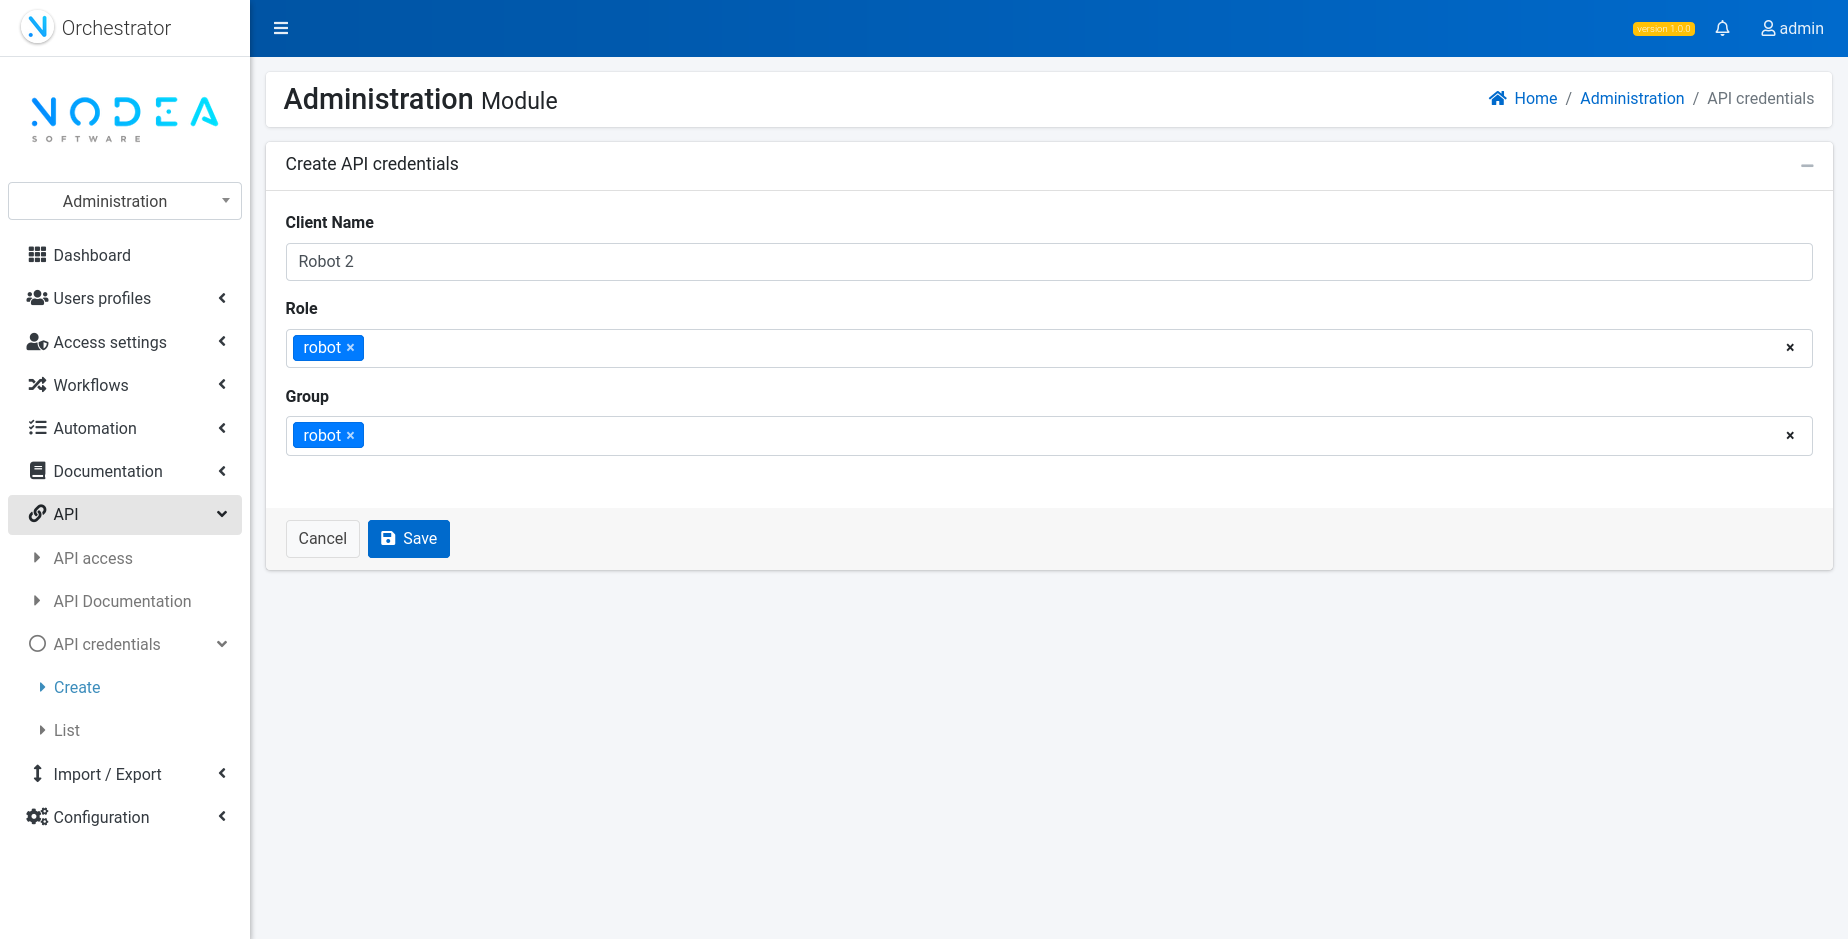
- In the orchestrator in the "Administration" module, create the API identifiers specific to each robot
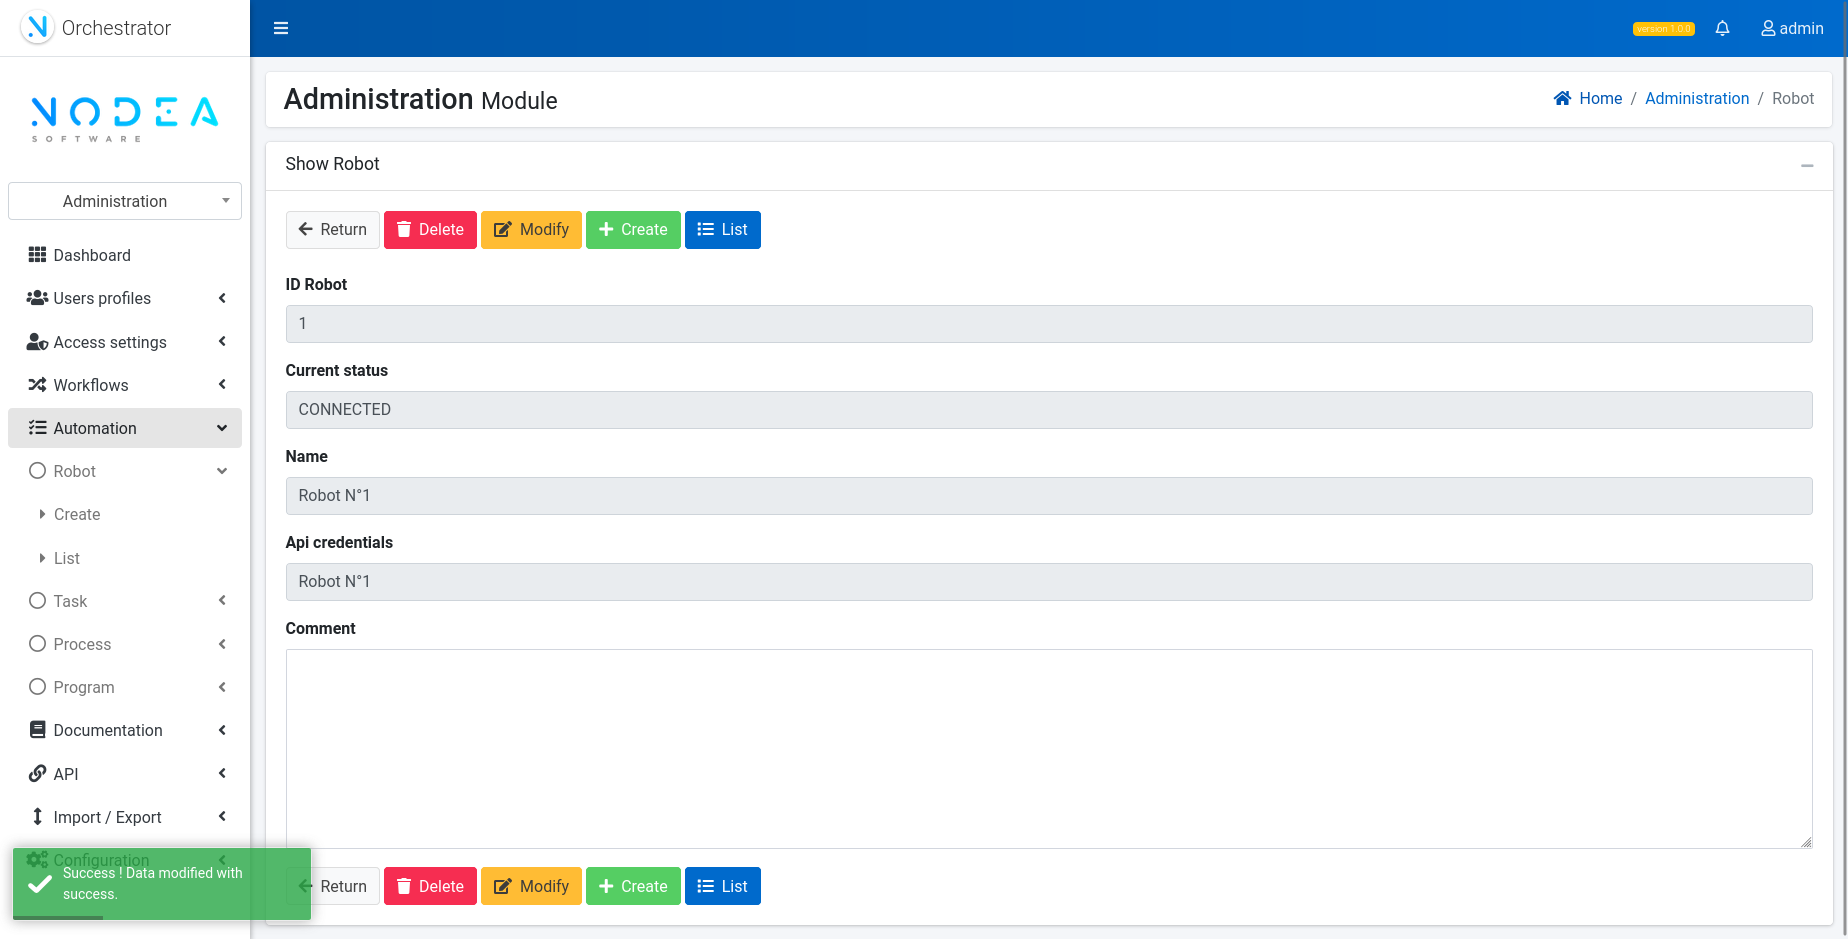
- Then create the robots of the park (ex: “Automate N°1”, “Automate N°2”, etc.) and associate them with the identifiers
- Launch the robot application on the workstation and click on "Configure the connection", then indicate the server (URL of the orchestrator), the API key and the secret code associated with the robot you are installing.
- Click on “Launch processing”.
¶ Automated process
¶ 1. How to set up an automated process ?
Create a new Orchestrator application in the Newmips Studio (see 4. Installation). The application has 2 modules: "home" and "administration"
Home module
Add a simple entity with a Nodea instruction (name it entity Request for instance). This entity wil be the entry point to post a request to your robot:
    create entity Request
    add field Synchronization date with type date and default value today
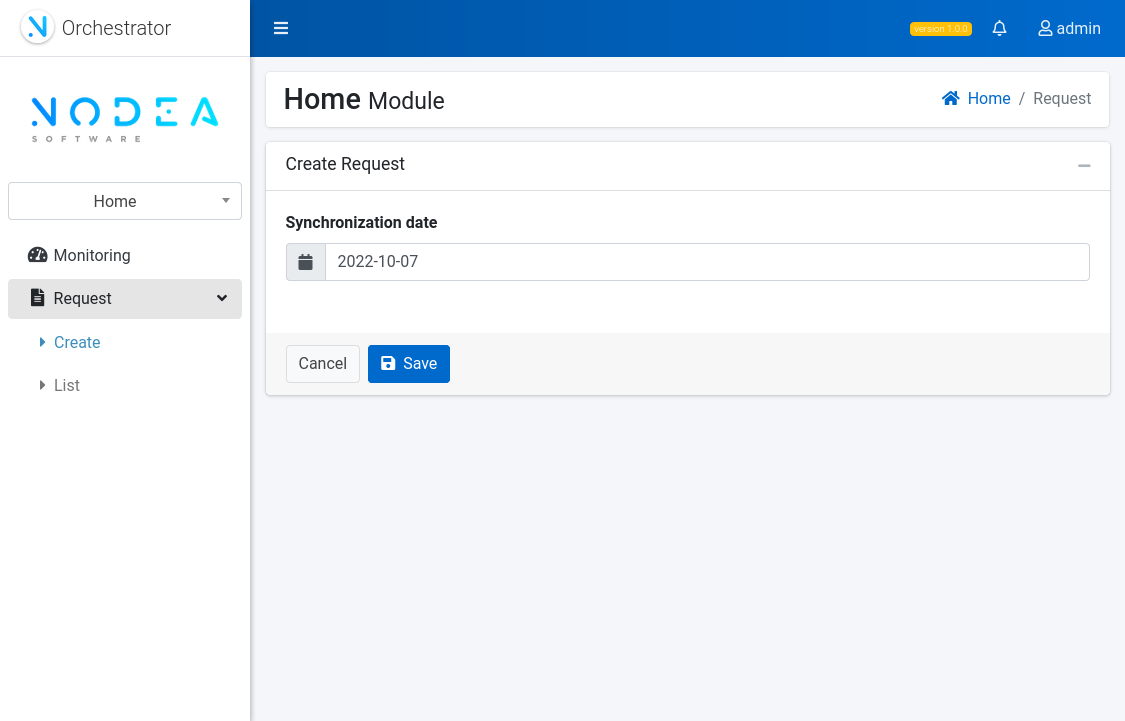
Add a component status with a Nodea instruction
add component status with name Status
Administration module
Go to the Administration module of your application:
Create API credentials for the robot
Save the robot settings and assign API credentials
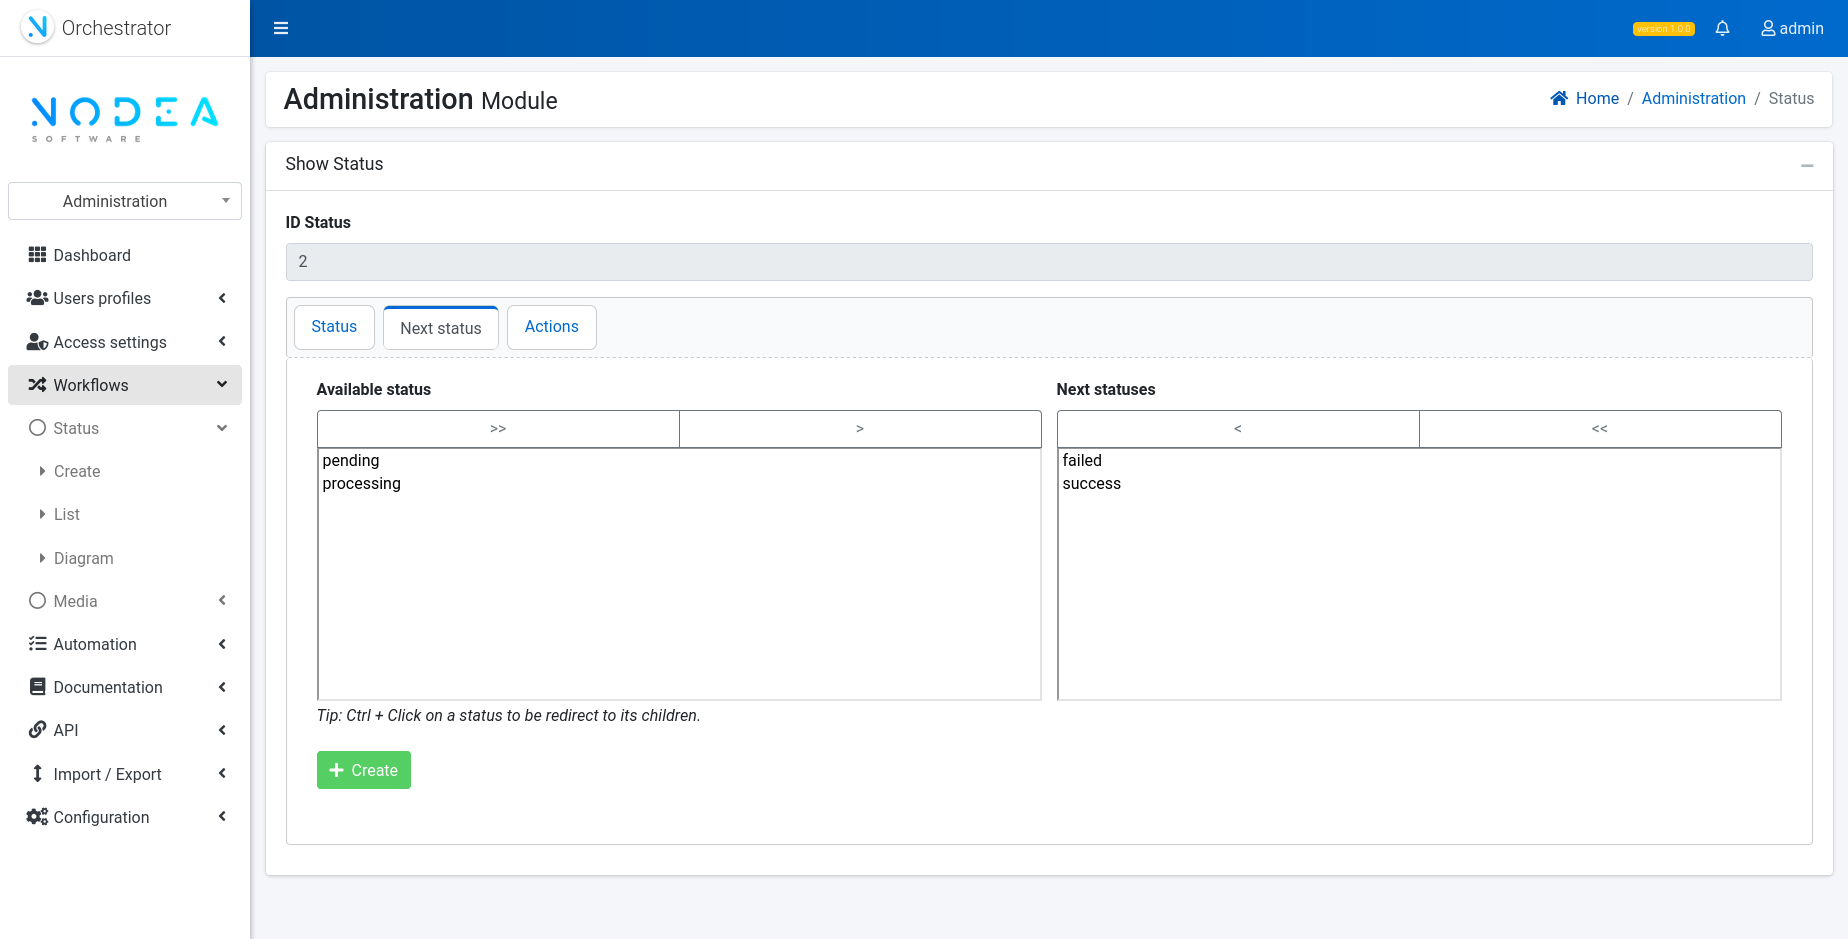
Define the available status for your "Request" entity: "Initial" > "Todo" > "Done" (use the "Next status" tab to create a workflow)
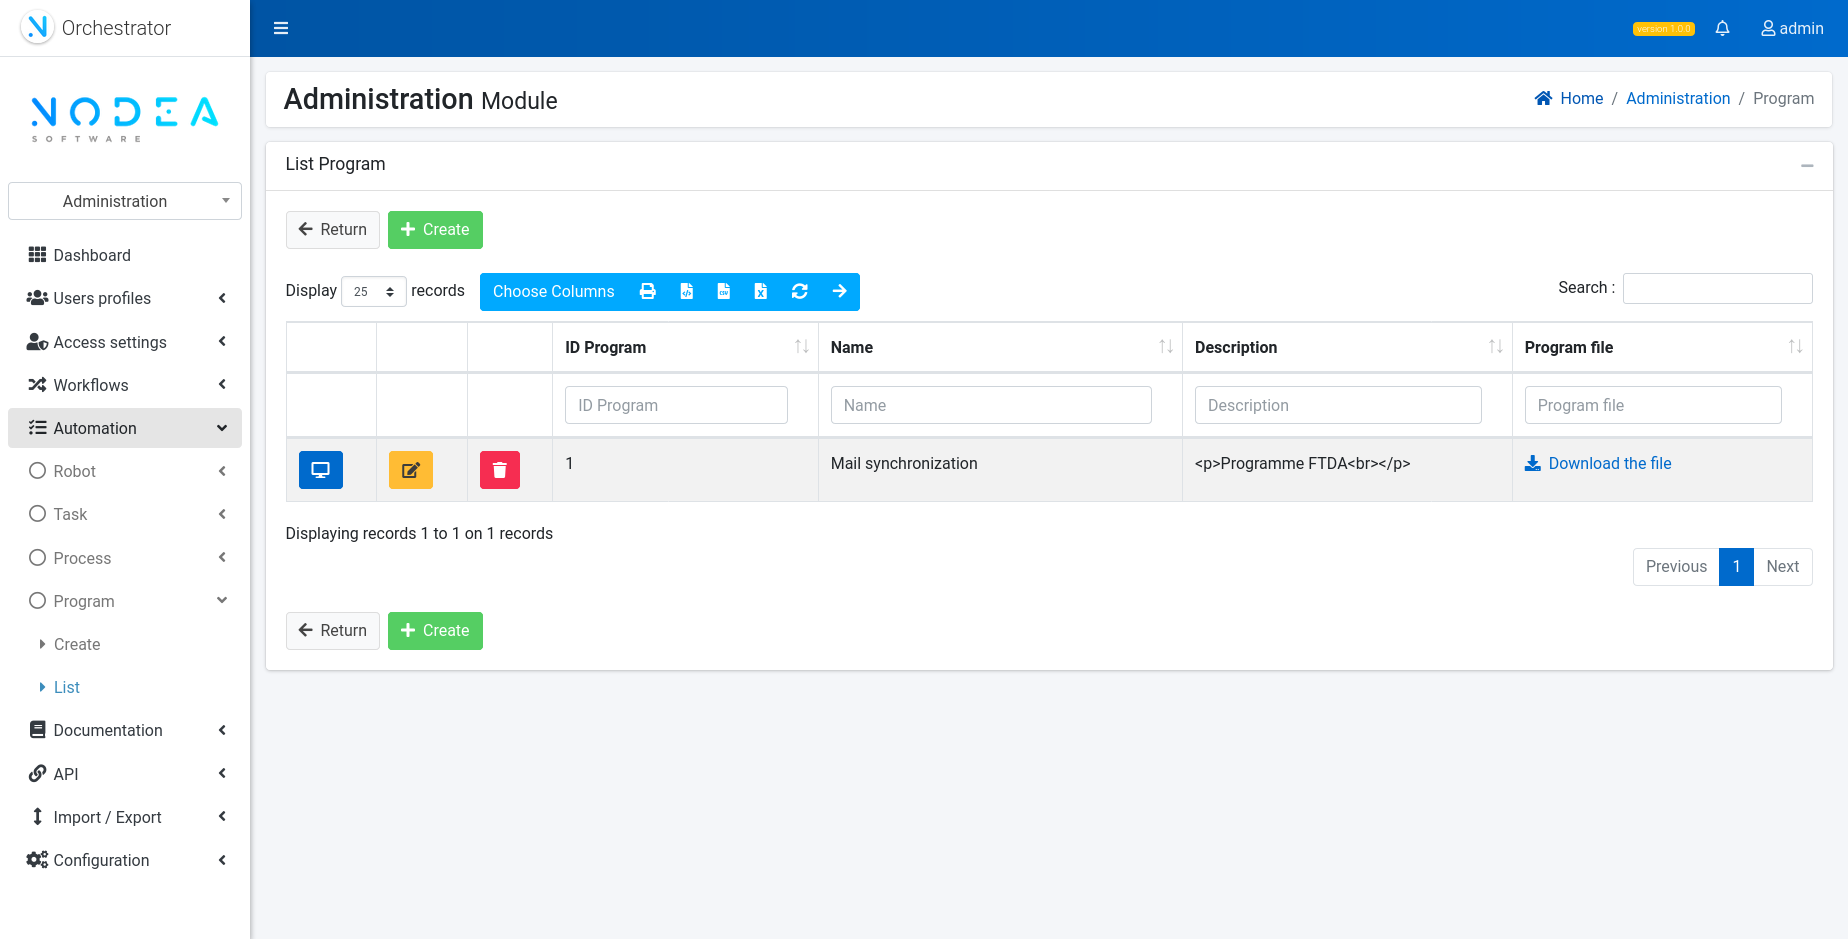
Create a new program called "My Program v1.0"
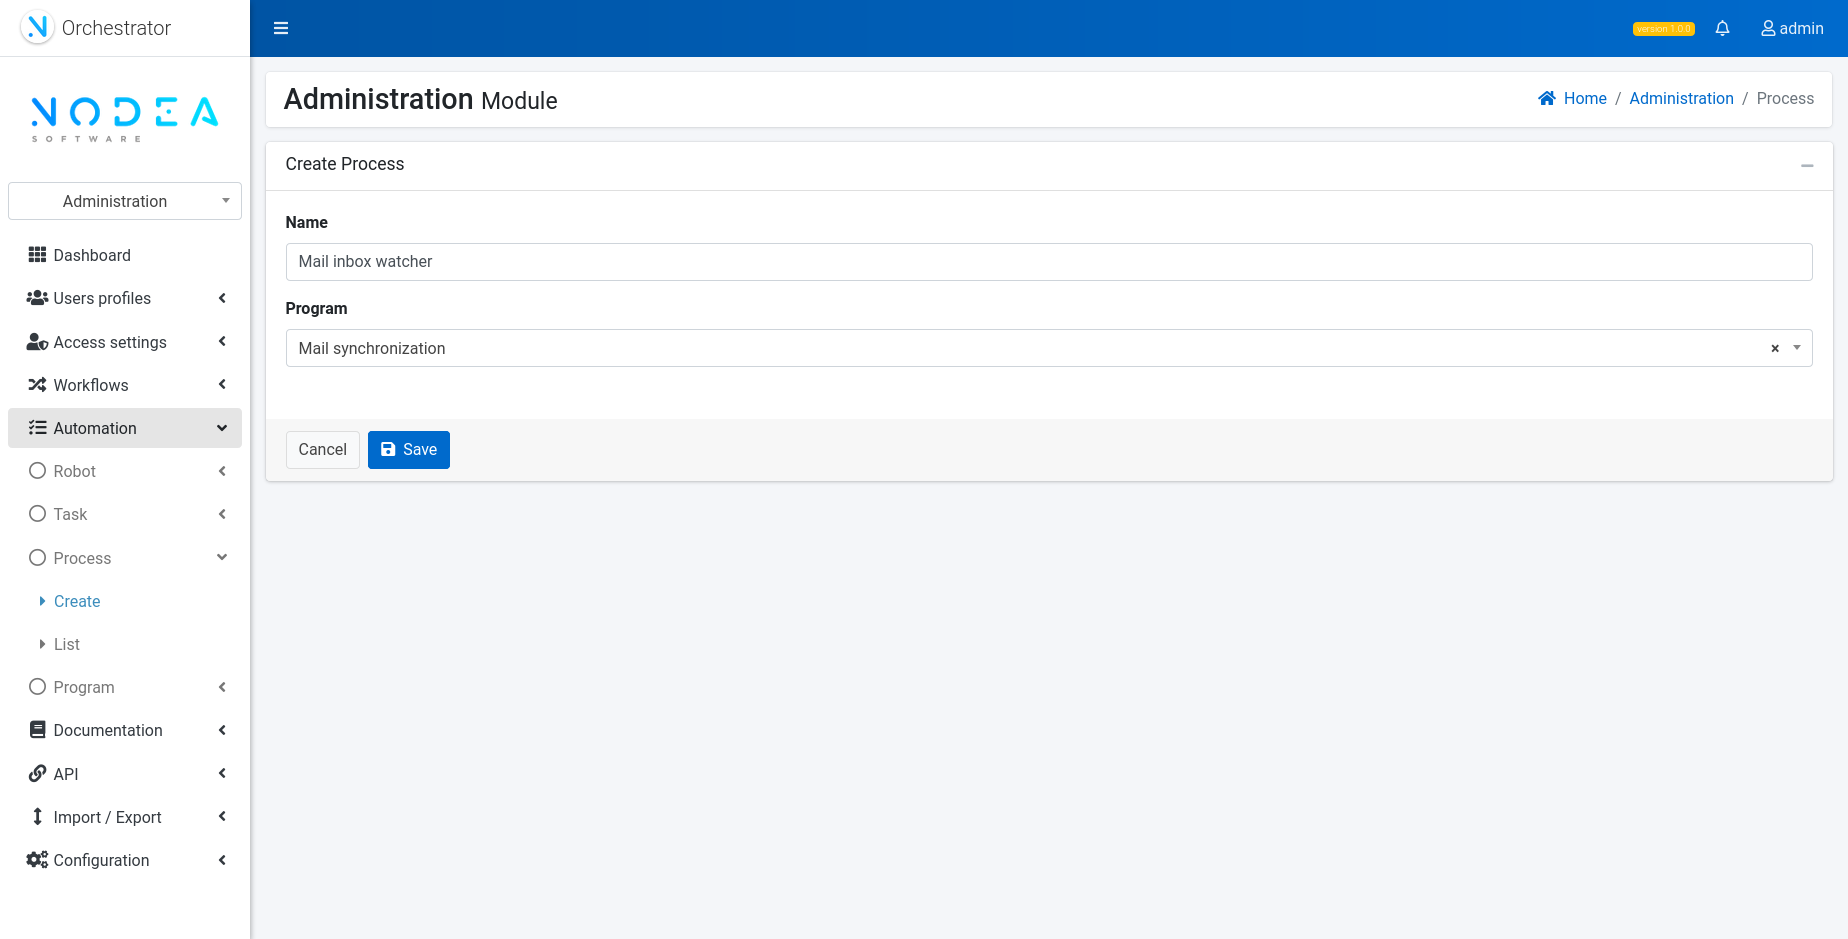
Create a new process called "My first automated process" and select the "My Program v1.0" program that you have just created
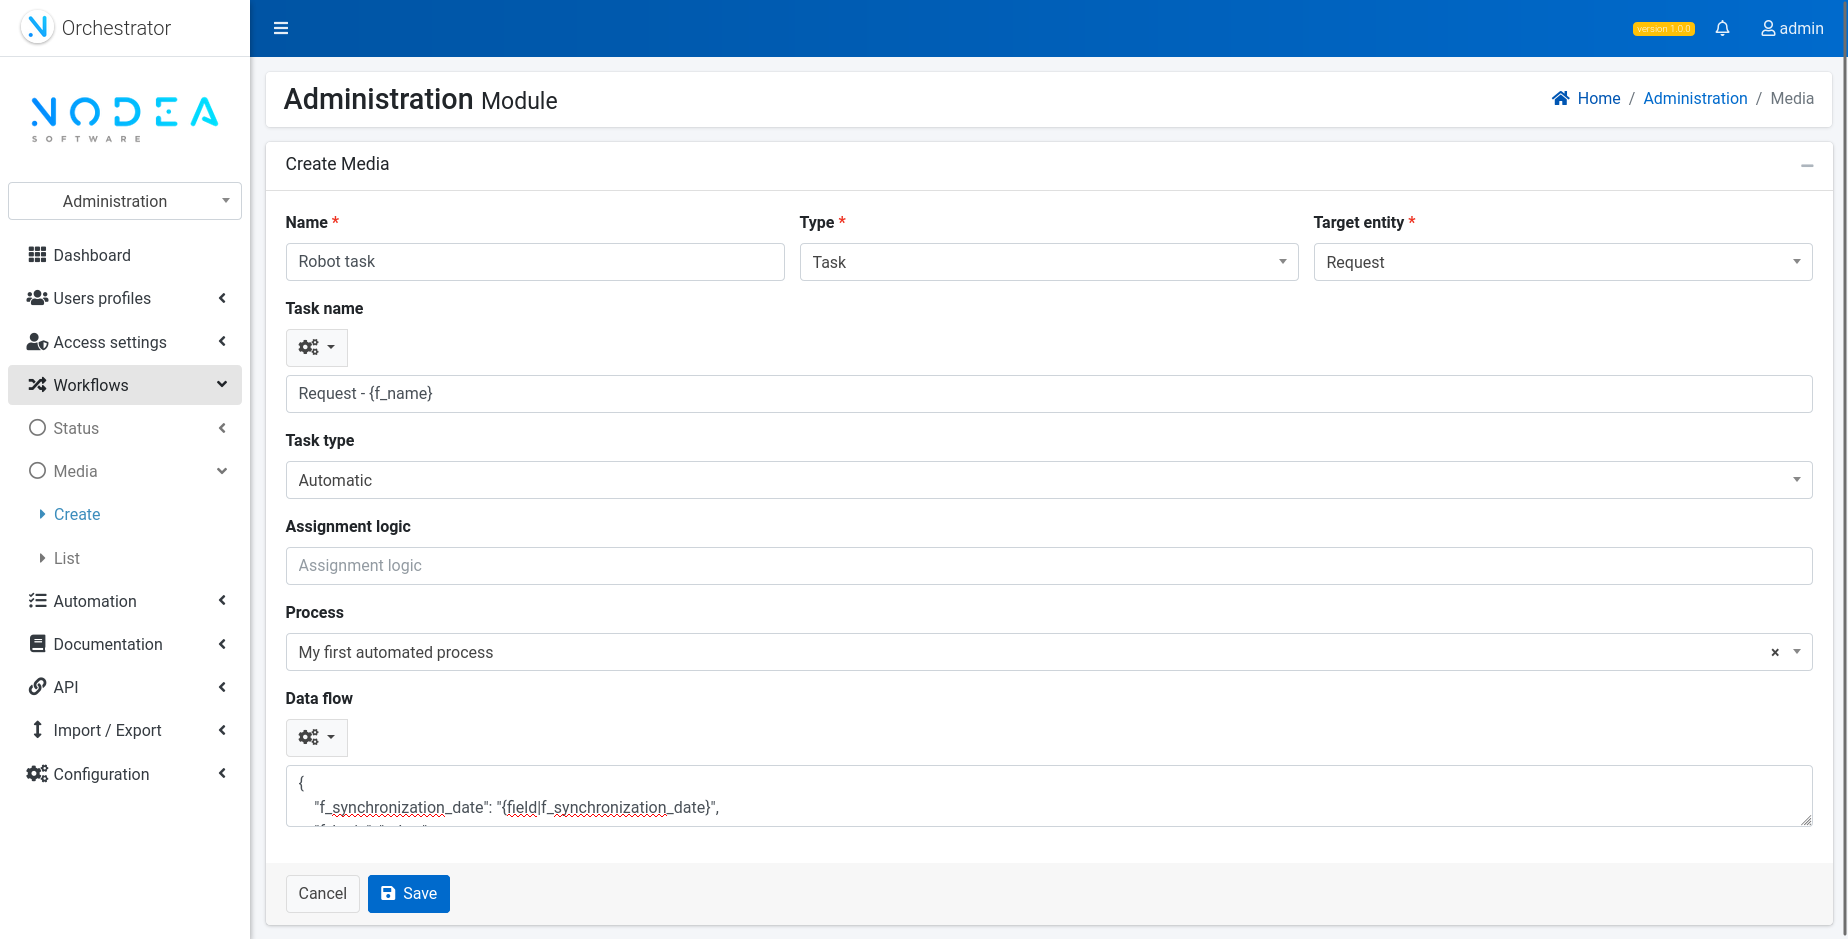
Create a new media with type "Media task" and title "Media - Automated task"
Select the following values :
- Target entity "Request"
- Task name "Request - {f_name}"
- Task type "Automatic"
- Process "My first automated process"
- Data flow (for instance) :
{
    "f_synchronization_date": "{field|f_synchronization_date}",
    "f_login": "robot",
    "f_password": "passwordrobot"
}
Adapt your data flow with any data you need from your "Request" entity to execute the task.
¶ 2. Designing the program
Go to the Administration module of your application:
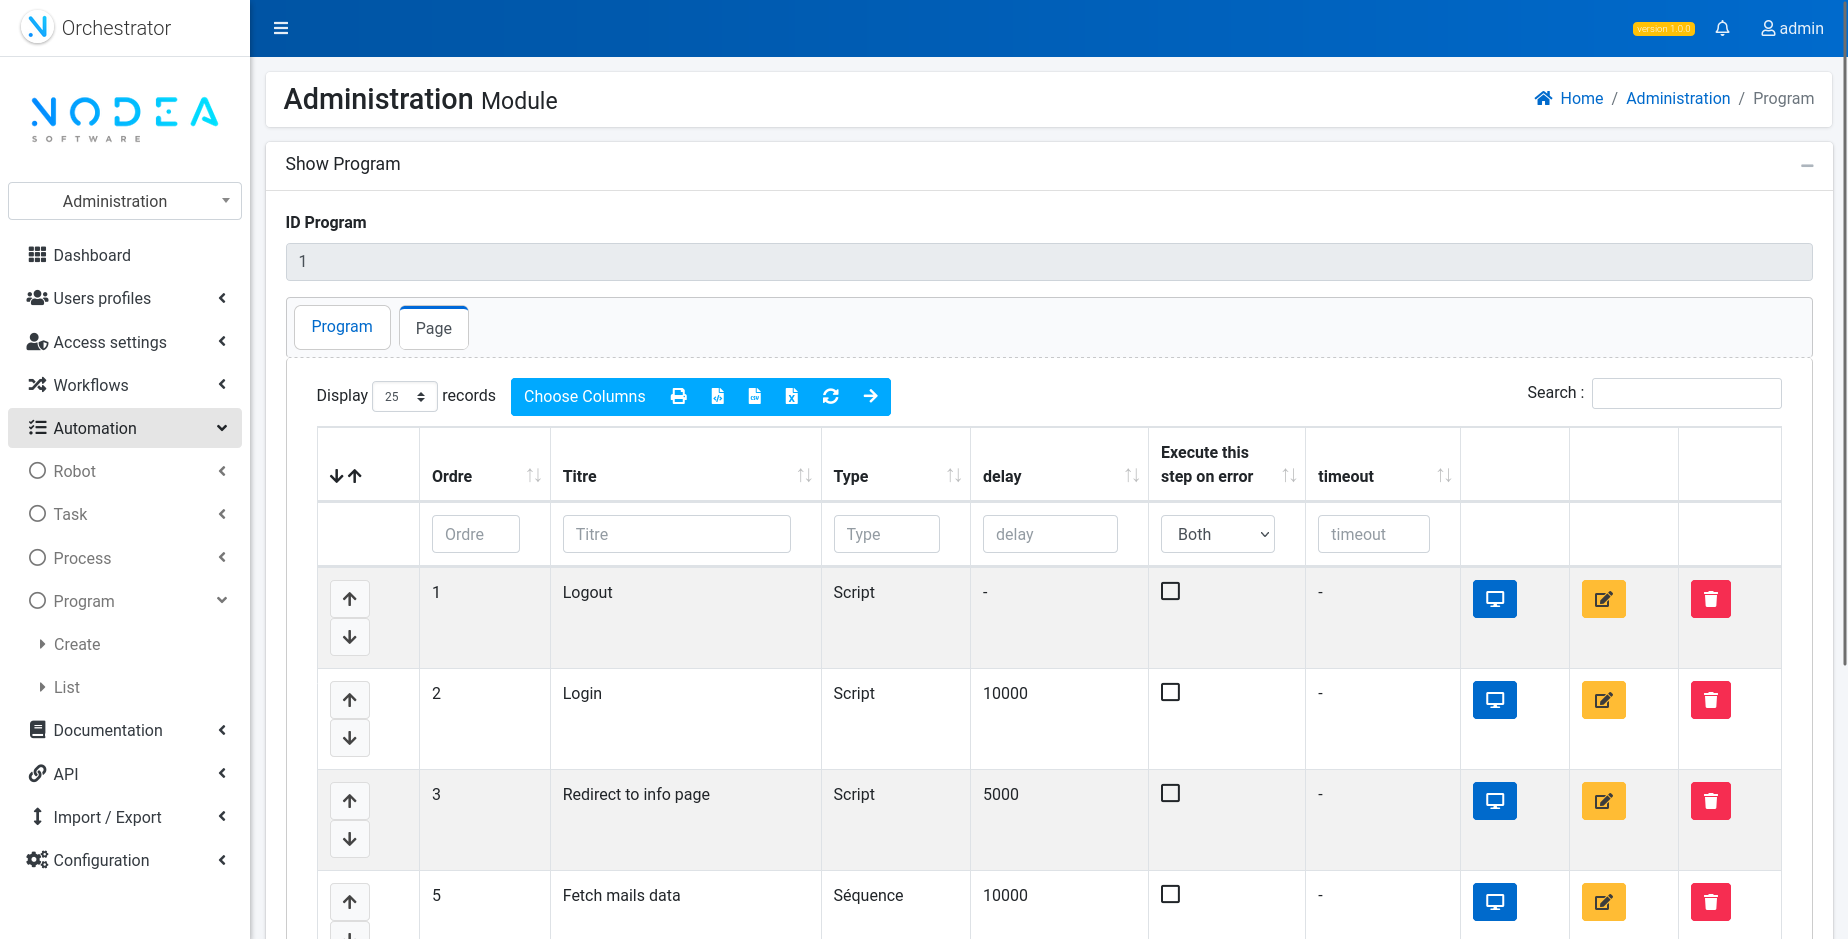
Display the "My Program v1.0" program and click on the "Step" tab
Create a new step (with type "Script") and define "Start URL" to call first Web page of process ; or simply indicate operations to be done in snippet (with type sequence)
Create any new steps and re order them to control the robots
¶ 3. Tools
RobotJS: enables to use the mouse (move, click, etc.) and type some text
Clipboard: enables to place string in flash memory
¶ Scripts
¶ 1. Variables
There are 3 kinds of variables in scripts:
- Step variables that comes from the step currently executed. Currently "stepIndex" and "serialNumber" are defined.
Syntax:
  stepData.stepIdx // Index of step in programme
  stepData.serialNumber // Displayed order in programme (which is equals by default to: stepIdx + 1)
For instance, during process script variable "stepData.isbn" will have value 5 and "stepData.serialNumber" will have value 6
- Environment variables that comes from the data flow of task
Syntax::
env.myVariable
For instance, if data flow is set with JSON value: ::
    {
        "isbn": "12345689"
    }
Then, script variable "env.isbn" will have this value "123456789"
- SessionData variables that are shared in all steps of program
Syntax:
sessionData.myVariable
For instance, if sessionData is set with values:
    {
        "book_name": "King Arthur"
    }
Then, variable "sessionData.book_name" will have value "King Arthur"
Another example, if you want to store a variable in a session for future re-use at the end of your script, simply return your variable to the robot ::
    (_ => {
        // Initialize Session variable to set list of "invoices"
        var data = [];
        data['invoices'] = [];
        $("tbody > tr").each(function () {
            let invoice = {};
            invoice.id = $(this).find('td:eq(0)').text();
            invoice.f_reference = $(this).find('td:eq(1)').text();
            invoice.f_date_invoice = $(this).find('td:eq(3)').text();
            invoice.f_amount = $(this).find('td:eq(5)').text();
            data['invoices'].push(invoice);
        });
        return data;
    })();
You can then access it in next sequence by referencing "utils.sessionData.invoices" (respectively "sessionData.invoices" in a script).
¶ 2. Action buttons
Action buttons provide native script instructions to execute simple actions in Web pages. You can access it when creating or editing a step of program.
Fill in forms
Complete fields with the following methods:
| Action | Description | Implementation code |
|---|---|---|
| Input field | Fill in an input using its name | $("input[name='myField']").val(myValue); |
| Drop-down list | Select a value in drop-down list | $("select[name='myField']").val(myValue).trigger('change'); |
| Check box | Click on checkbox | $("input:checkbox[name='myCheckBox']").attr('checked', true); |
| Activate Radio button | Activate a radio button | $("#myRadioButton").prop('checked', true); |
| Submit form | Submit a form using its name | $("form[name='myForm']").submit(); |
| Click element | Click an element referenced by its id | $("#myElement").click(); |
Read screen
Retrieve information displayed in screen with the following methods:
| Action | Description | Implementation code |
|---|---|---|
| Read text | Grab text value in a displayed element | $("div[name='myElement']").textContent; |
| Read field | Retrieve field value | $("input[name='myField']").val(); |
| Find element | Find an element referenced by its id | $("#myRootElement").find(myElement); |
Type keys
Execute keyboard typing actions with the following methods:
| Action | Description | Implementation code |
|---|---|---|
| Press Enter | Press key "Enter" (same as "Return" key) | Send key event with code "Enter" (13) |
| Press Tabulation | Press key "Tab" | Send key event with code "Tab" (9) |
| Press Backspace | Press key "Backspace" | Send key event with code "Backspace" (8) |
| Press Escape | Press key "Esc" | Send key event with code "Escape" (27) |
| Press any key | Send key event with the code specified as a parameter | Find your key code on https://keycode.info/ |
Navigate
Navigate in a browser window with the following methods:
| Action | Description | Implementation code |
|---|---|---|
| Open a new tab | Press shortcut "Ctrl + T" in browser | Send key event with code "T" (84) + Ctrl |
| Change tab | Press shortcut "Ctrl + Tab" in browser | Send key event with code "Tabulation" (9) + Ctrl |
| Open new URL | Open specified location in browser | this.location.href = 'myURL'; |
Interrupt program
Exit the program with the following methods:
| Action | Description | Implementation code |
|---|---|---|
| Exit program | Throw error to stop the program with specific code | throw 'myErrorCode'; |
Note. Action buttons covers main situations you may encounter in scripting. Unfortunately, sometimes you must adapt the code to Website implementation and specificities. Remember that script steps support JQuery usage. Please refer to JQuery API Documentation for further information on DOM manipulations - https://api.jquery.com/jquery/
¶ 3. Examples
Fill in a login form
First script example deals with a simple login form to fill and submit ::
    (_ => {

        // Fill in a field
        $("input[name='login_user']").val(env.f_login);

        // Fill in a field
        $("input[name='password_user']").val(env.f_password);


        // Submit a form
        $("form[name='login_form'").submit();


    })();
Input and button names can be found in browser using "Developer console" (press key "F12" to open it).
Grab data in a web page
Second script is about retrieving data from a Web page and set values in session ::
    (_ => {
        // Declare local variable
        let data = {};

        // Read text
        data.name_user = $("div[name='name_user']").textContent;

        // Read text
        data.email_user = $("div[name='email_user']").textContent;

        // Set data in session
        return data;
    })();
Sequences
¶ 1. Variables
There are 2 ways of manipulating variables in sequences:
- Environment variables that comes from the data flow of task
Syntax::
env.myVariable
For example, if data flow is set with JSON value: ::
    {
        "isbn": "12345689"
    }
Then, sequence variable "utils.env.isbn" will have value "123456789"
- SessionData variables that are shared in all steps of program
Syntax::
sessionData.myVariable
For example, if sessionData is set with values: ::
    {
        "book_name": "King Arthur"
    }
Then, sequence variable "utils.sessionData.book_name" will have value "King Arthur"
¶ 2. Action buttons
Action buttons provides native script instructions to execute simple actions in Web pages. You can access it when creating or editing a step of program.
Download
Manually download a file from a specific URL with the following method:
| Action | Description | Implementation code |
|---|---|---|
| Download | Download a file located at a specific URL | utils.download('FILE_URL'); |
Downloaded files are avaible in folder "exec/downloads" of robot installation directory.
Upload
1. Upload a file using user interface
Procedure is valid for HTML5 input file and clickable dropzones. It consists in:
- Clicking on input file or dropzone (we assume this action has been performed in previsous script step and dialog box in now opened)
- Open filepath in dialog box (using Ctrl + "l" and removing any browser suggestion with backspace)
- Copy and paste filepath
- Press enter to submit the dialog form
Syntax:
        var robot = require("robotjs");
        robot.setKeyboardDelay(1);

        const delay = require('delay');
        await delay(2000);

        // robot.keyTap("l", "control");
        robot.keyTap('l', process.platform==='darwin' ? 'command' : 'control')
        await delay(2000);

        robot.keyTap('backspace', process.platform==='darwin' ? 'command' : 'control')
        await delay(500);

        const { clipboard } = require('electron')
        clipboard.writeText(download.filePath);
        robot.keyTap('v', process.platform==='darwin' ? 'command' : 'control')

        await delay(2000);
        robot.keyTap('enter');
2. Upload a file on the orchestrator application:
Procedure enables to store a file in orchestrator for future reuse
Syntax::
    // Upload a document
    const downloads = await utils.waitDownloads();
    for (const download of downloads)
        if (download.state == 'success')
            await utils.upload('API_URL', download.filePath)
Mouse events
Execute mouse actions with the following methods:
| Action | Description | Implementation code |
|---|---|---|
| Move cursor | Move cursor at a given position (can be obtained using Recorder - See below) | robot.moveMouse(x, y); |
| Click | Click with the left button | robot.click(); |
| Right click | Click with the right button | robot.click('right'); |
| Double click | Click with the right button | robot.click('left', true); |
Keyboard events
Execute keyboard actions with the following methods:
| Action | Description | Implementation code |
|---|---|---|
| Type text | Type text on standard output (/!\ "qwerty" keyboard only ; use copy / paste clipboard instead) | robot.typeString('myText'); |
| Hit a key | Type a key on standard output | robot.keyTap('f2'); |
Interrupt a program
Exit a program with the following methods:
| Action | Description | Implementation code |
|---|---|---|
| Exit program | Throw error to stop the program with specific code | utils.error('myErrorCode'); |
¶ 3. Examples
Send information to the orchestrator
The first sequence example explains how to update an entity (entity "Product" in this case) in the Orchestrator application using API ::
    module.exports = {
        execute: async utils => {

            // Test condition
            if (utils.sessionData.product) {

                // Update server entity
                let form = {};
                form.f_name = product.f_name;
                form.f_description = product.f_description;

                utils.api.call({
                    url: '/api/product/' + utils.sessionData.product.id,
                    method: 'put',
                    orm: form
                });
            }
        }
    }
Manipulate a desktop application
The second sequence example enables to use a Libre Office spreadsheet with a mouse and keyboard::
    module.exports = {
        execute: async utils => {

            var cp = require("child_process");
            cp.exec("libreoffice");

            // Mouse mouse a given position
            // Open a new spreadsheet
            robot.moveMouse(256, 33);

            // Click
            robot.mouseClick();

            // Type some text
            robot.typeString('123');

            // And so on...

        }
    }